3D videos have revolutionized the way we witness live events, advertising, gaming, education, and entertainment. From blockbuster CGI flims to animated product advertisements and virtual walkthroughs, 3D video creation has come a important visual medium. But numerous newcomers feel overwhelmed by the process, assuming it requires advanced specialized chops or precious software. The verity is, anyone with creativity, tolerance, and the right tools can learn How to make a 3D video.
we will break down the entire process in a simple, structured, and freshman-friendly way so you can start your 3D video trip with confidence.
What is a 3D video?
A 3D video is a digitally created visual that simulates depth, movement, and literalism in a three- dimensional space. Unlike traditional 2D videos, which are flat, 3D videos allow objects to live in a virtual terrain where they can rotate, move, and interact like real- world rudiments.
3D videos are extensively used in
Animated flicks
Product visualization
Architecture walkthroughs
Gaming cinematics
Marketing and advertising
Educational simulations
Medical visualizations
Commercial donations
Step 1: Define Your Concept and Story
Before touching any software, the first step is to plan your video.
Ask yourself
What’s the purpose of the video? ( announcement, film, education, rally, etc.)
Who’s the target followership?
What communication do you want to convey?
What style do you want? ( Realistic, cartoon, abstract, cinematic?)
produce an introductory script or storyboard. Indeed,d rough sketches help guide your illustrations and vitality.
Step 2: Choose the Right 3D Software
There are several assiduity- standard tools for making 3D videos. Some are freshman-friendly, while others are professional- grade.
Stylish 3D Software Options
1. Blender( Free & important)
Stylish for newcomers and professionals
Used for vitality, modeling, lighting, and rendering
2. Cinema 4D
Popular in stir plates and advertising
3. Maya
habituated heavily in film and game workrooms
4. 3ds Max
Common in armature and product visualization
5. Fantastic Machine
Used for real- time 3D picture and virtual surroundings
Still, Blender is the stylish place to start because it’s free and largely able, if you’re a freshman.
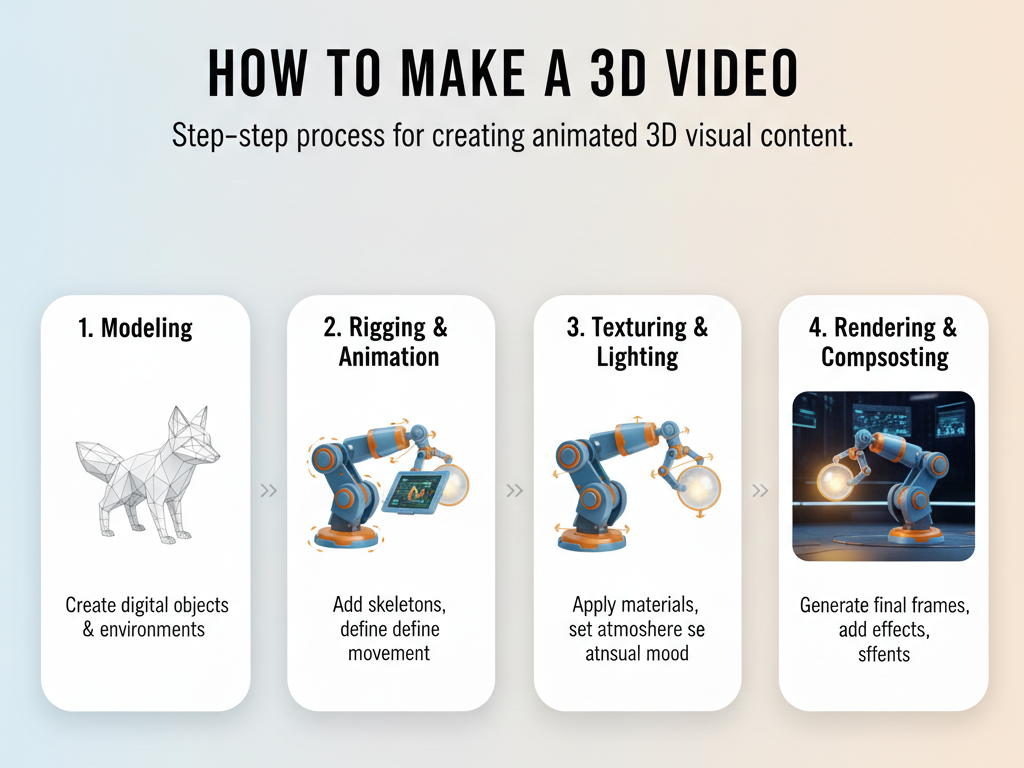
Step 3: Produce or Import 3D Models
A 3D video requires objects, characters, or surroundings.
You can either
produce your own models inside the software
Download ready- made models from spots like
Sketchfab
TurboSquid
Free3D
Make sure models are optimized and not too heavy, or your software may slow down.
Step 4: Figure Your Scene
Now it’s time to place objects in a virtual space.
This includes
Positioning characters or products
Designing background surroundings
Adding props
Setting camera angles
Suppose like a filmmaker arranging a real set.
Step 5: Add Lighting
Lighting is one of the most important aspects of a 3D video.
Without proper lighting, indeed, the stylish models can look flat or unrealistic.
Common lighting types in 3D
Crucial Light – Main source of light
Fill Light – Softens murk
Back Light – Adds depth and separation
trial with brilliance, murk, and color tones to achieve a cinematic look.
Step 6: Amp Your Objects
Now comes the movement.
You can amp
Camera movement
Character movement
Object gyration
Environmental goods( bank, fire, water)
The utmost 3D software uses keyframes to control vitality over time.
For illustration
Frame 1 Object at position A
Frame 100 Object at position B
The software fills in the movement automatically.
Step 7: Apply Textures and Accoutrements
Textures make your objects look realistic.
You can add
Essence shells
Glass reflections
Fabric details
Wood grains
Skin tones
This step transforms introductory shapes into naturalistic illustrations.
Step 8 : Add goods( VFX & CGI)
To enhance your video, you can add goods like
Bank
Fire
Sparks
Fog
stir blur
Depth of field
These rudiments make your 3D video look more cinematic and professional.
Step 9: Render the Final video
The picture is the process of converting your 3D scene into a final video train.
You can choose
Resolution 1080p, 2K, 4K
Frame rate 24 fps, 30 fps, 60 fps
Advanced quality means longer picture time.
Step 10: Edit and Add Sound
Once your video is rendered, you can import it into video editing software like
Adobe Premiere Pro
Final Cut Pro
DaVinci Resolve
Add
Background music
Sound goods
Voiceover
Transitions
This final polish brings your 3D video to life.
Common Miscalculations to Avoid
1. Overfilling scenes with too numerous objects
2. Poor lighting setup
3. Low- quality textures
4. Too fast camera movements
5. Ignoring sound design
Why 3D videos are important
3D videos help brands and generators
snare attention incontinently
Explain complex ideas visually
Show products really
Ameliorate engagement and transformations
This is why businesses, filmmakers, and marketers are investing heavily in 3D vitality and CGI.
Conclusion
Creating a 3D video may feel complex at first, but with practice, creativity, and the right workflow, anyone can master it. Whether you’re a pupil, filmmaker, marketer, or content creator, 3D videos offer endless possibilities for learning and visual communication. However, expert CGI and cinematic vitality, if you want professional- position 3D videos. Framexentertainment is a full- service visual product house specializing in high- quality 3D, CGI, VFX, and amped content.
FAQs (Frequently Asked Questions)
Do I need rendering to make a 3D video?
No. utmost 3D software is visual- grounded and doesn’t require coding.
Can I make a 3D video on my laptop?
Yes, but an important laptop with a good GPU will help render briskly.
How long does it take to make a 3D video?
It depends on complexity. A short clip may take days; a full vitality can take weeks.
Is Blender good for newcomers?
Yes. Blender is free, important, and extensively used.